How to Get Started with Infrared

If you have found your way to this page you are likely to be standing in the same spot I was recently. You have discovered some very interesting images that are labeled “IR” and you want to know how you can do that too.
Keep reading to find out.
A while back I started a new adventure with my photography, and I still haven’t given up on infrared. While being quite the learning experience, this adventure has also been quite rewarding. If you are considering diving into this pool, great! But there are a few things that are helpful to know and will assist you when getting your feet wet.
But first! Know that this is all subjective, YOU are the artist! You do what works for you, these are just some things that proved helpful to me.

Know How Your Camera Works
This can be said of photography in general. While you don’t need to memorize every single menu sub-section or know what each pixel does (I certainly don’t), it’s always helpful to understand how the tools we use actually work. Because regardless of whether you are shooting IR or not, the camera still works to manipulate light in the same ways. I’m talking about the absolute basics here, the science of light, and the mechanics of ISO, aperture, shutter speed, focusing, etc. These are all things I learned in the analog world of photography, and they still apply today.

Understand What Infrared Light is
All light is part of something called the electromagnetic spectrum. Everyone remembers ROY G BIV right? Well, infrared light is just an extension of that. It’s still light, just not the type that human eyes perceive naturally. This is the science part. And there are tons of educational materials out there on the interwebs that provide information that will help you understand. The easiest place to start is at the two industry standards (in the US), Kolari and LifePixel. Then just keep asking questions.

Get Comfortable with Editing Software
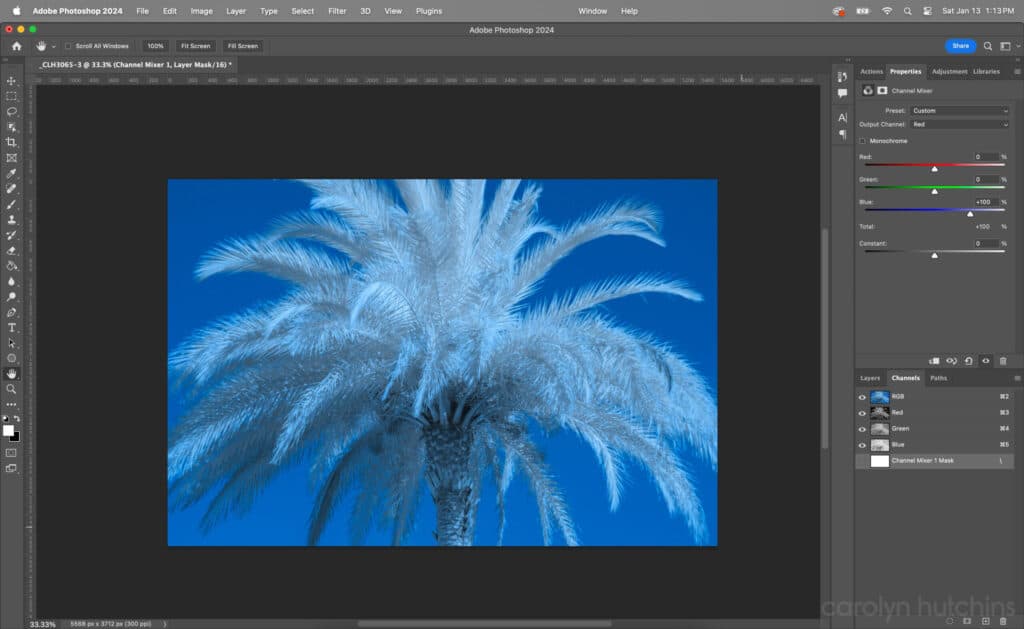
There is more to photography than simply composing an image, that image then has to be processed for the purpose of it’s intended use. Fortunately, there is a ridiculous amount of choices when it comes to software, some free, some paid, all with countless variations. Everyone can find something that works for them. With respect to this point, it is especially helpful to understand color channels, and to know how your individual software of choice handles them. Because you will be doing a lot of color swapping.

Shooting
Now that you have the basics down, the next step is to decide how you want to shoot. The best way is through a digital camera that has converted specifically for recording infrared light.
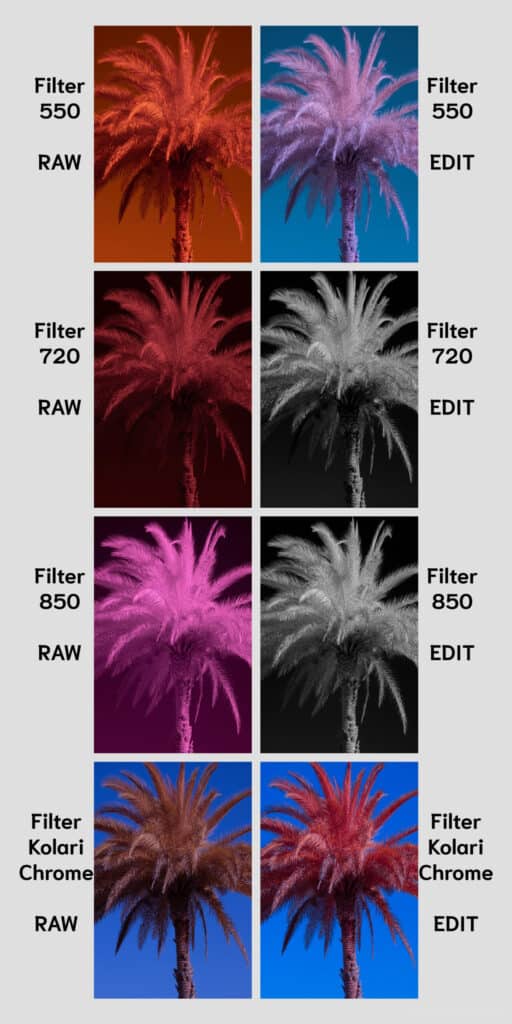
As detailed in my previous post, the camera I settled on is a Nikon Zfc with a full spectrum conversion. Starting with two filters, a 550 nm and 850 nm, one on each side of the near infrared spectrum. I have since added two more, a 720 nm, which is widely accepted as “Standard IR”, and the multi-wavelength Kolari Chrome, which is meant to imitate the look of Kodak Aerochrome film. I’m not sure yet whether my next step will be another multi-wavelength filter such as the “Super Blue” from LifePixel, or the complete opposite direction with Ultra-Violet.
In the examples below, I shot the same scene, at the same time, with same lens, but switched the filters. One is a lakefront in my hometown, the other is a palm tree in my front yard. These are the RAW files straight from the camera, followed by my processed final images.


Finally, you must allow yourself room to grow.
Remember there is always a learning curve when it comes to new things. Practice patience. Don’t expect to figure it all out right away, and keep in mind there will always be new learning opportunities.
Helpful Links