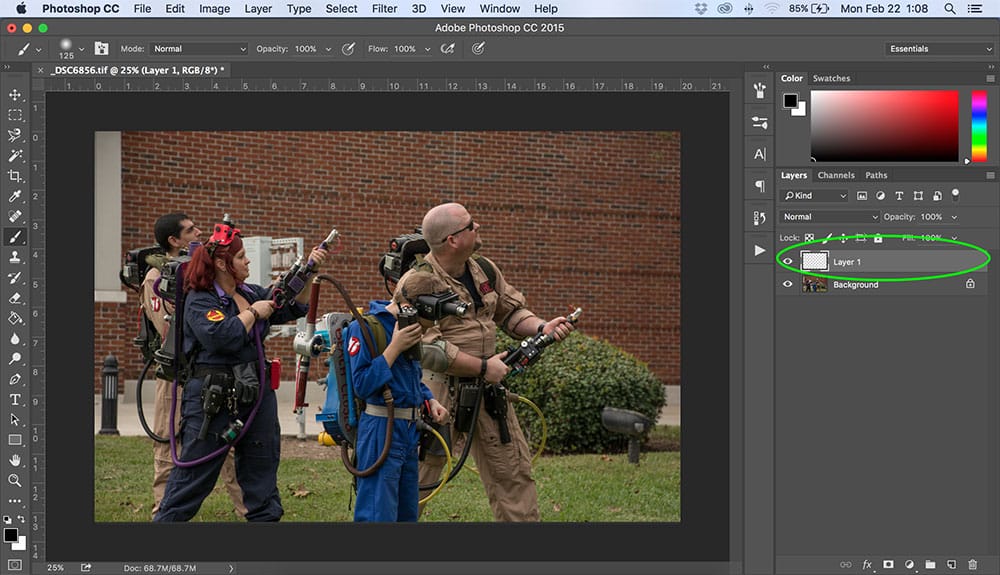
Open your image in Photoshop and create a new layer (this should be a blank, empty layer)age. For this photo I used 125px
How To : Create a Ghostbusters Proton Stream
Disclaimer: Since this is my first “How To” post about anything, I figured I’d start with something fairly easy. I do hope you find it useful.
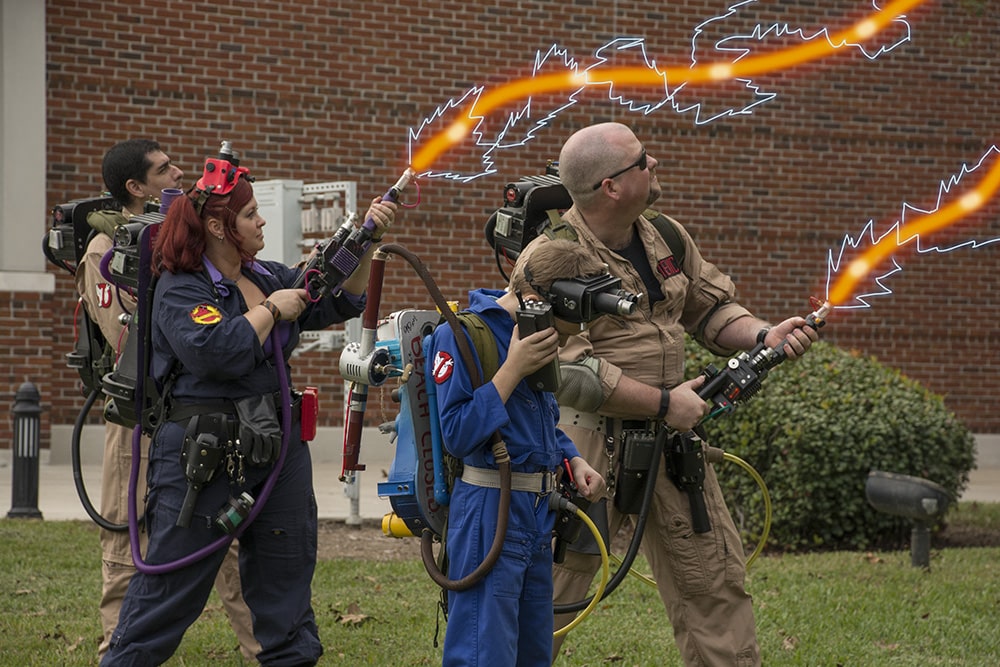
I am going to share a quick way to add a Ghostbusters style Proton Stream to a photo.
You can click here to see a few I have already done.
You will need a camera, Photoshop (or other photo-editing software that supports layers), and it will help if you have a basic understanding of how to use both. Here I am using Photoshop CC 2015.
First, you have to find someone (or a few) who are willing to be seen in public, and let you photograph them, while dressed as Ghostbusters. (this may not be as difficult as you think, just try asking)
Step 1
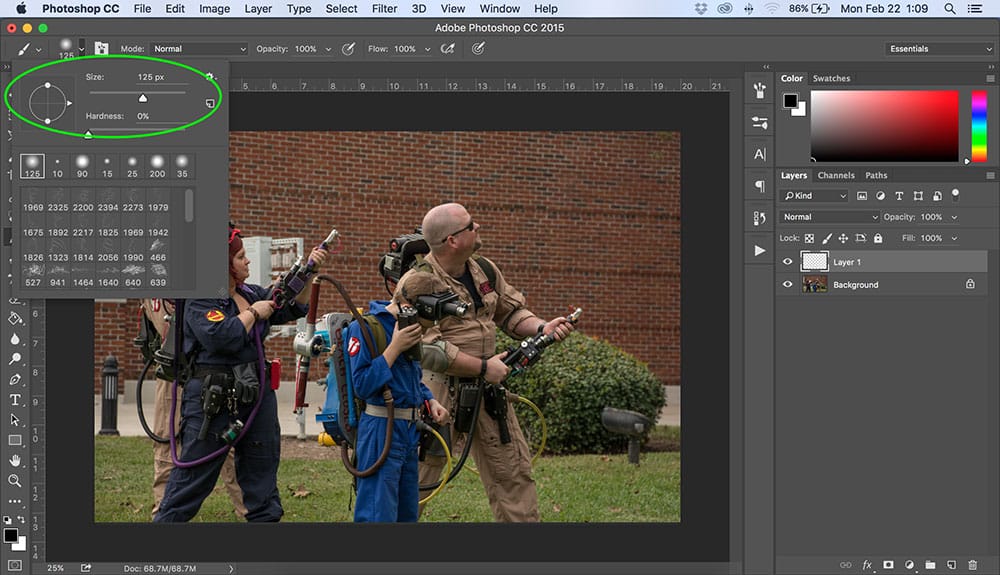
Next you want to open up your paint brush options. You want a brush that’s pretty thick and fuzzy. The actual size that you need will depend on your specific image. For this photo I used 125px
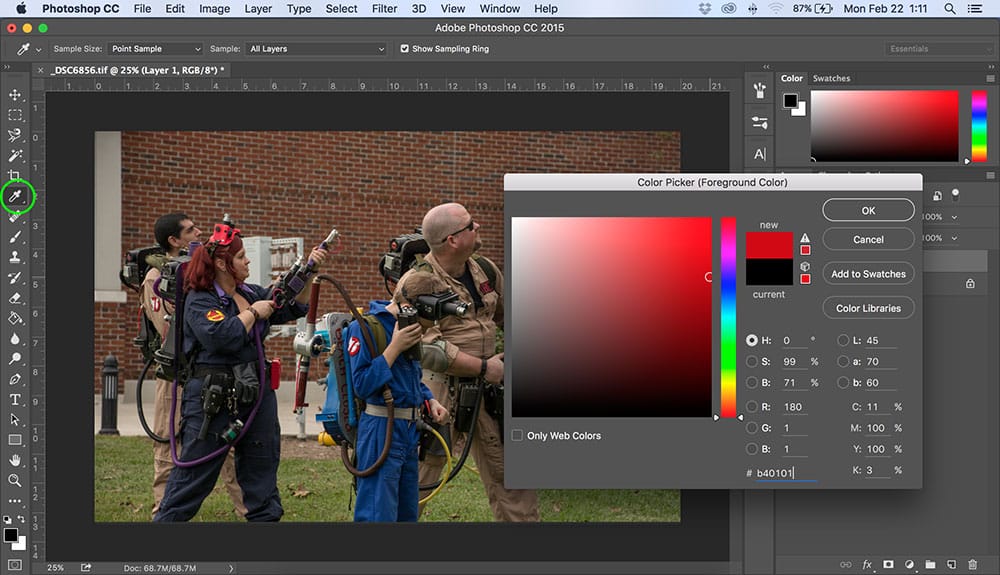
Now you need to select a color to paint with. You want something bright red, here I used b40101. But you can use whatever you like.
Step 2
Paint a red line on the blank layer
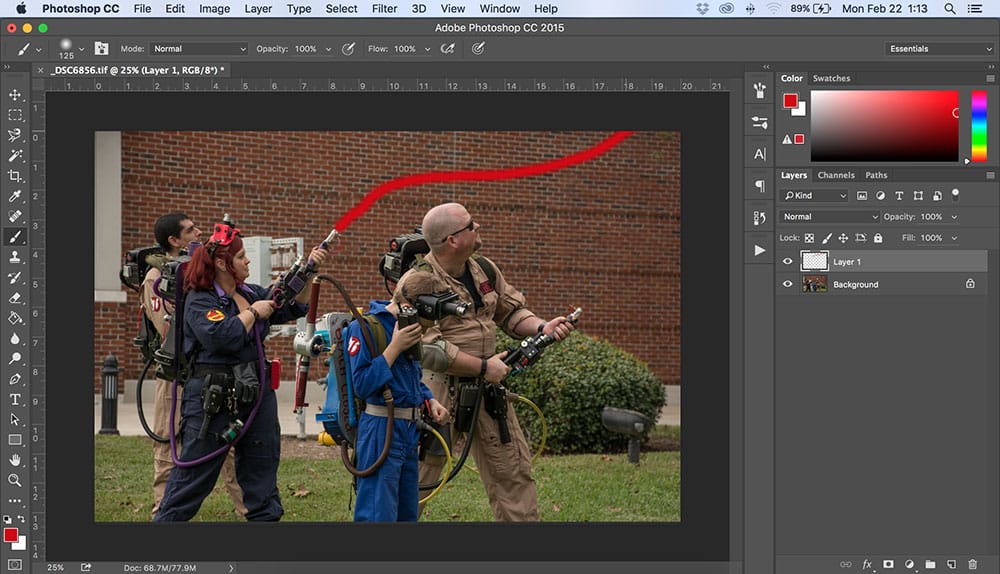
Step 3
Double click on the layer to open up the Layer Styles options. Now add an Outer Glow using the same red color that you painted with. The individual settings you use will depend on your photo. Here are the ones I used.
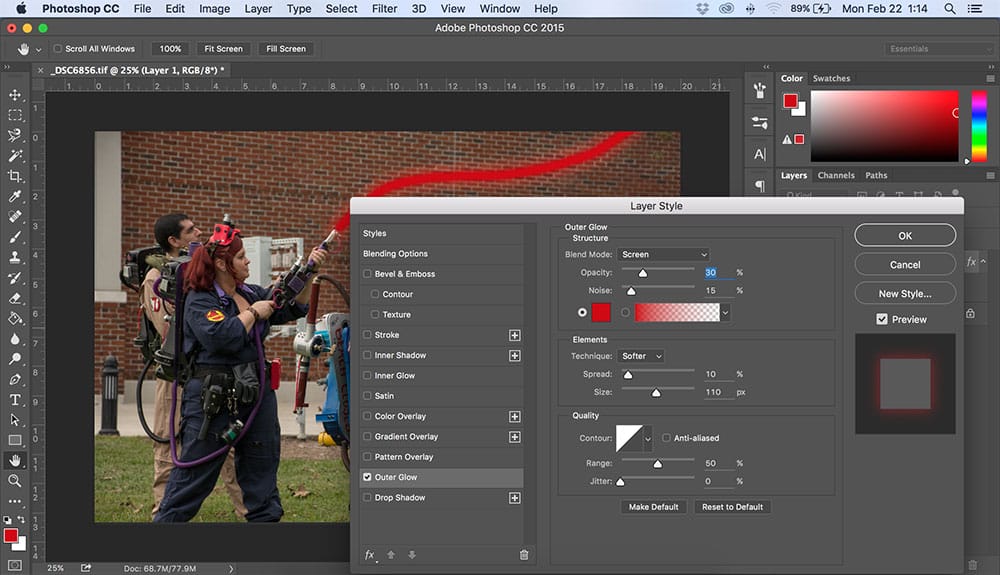
Step 4
Duplicate that layer
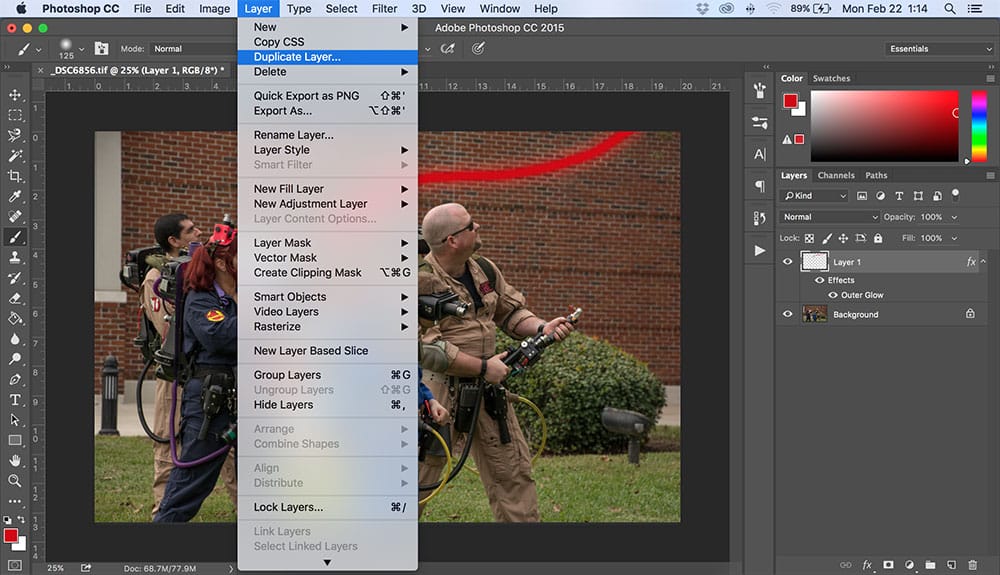
Double click on the duplicated layer to open up the Layer Styles options. Remove the Outer Glow from this layer and add a Color Overlay. You want something bright yellow, I used fff000 with the settings shown.
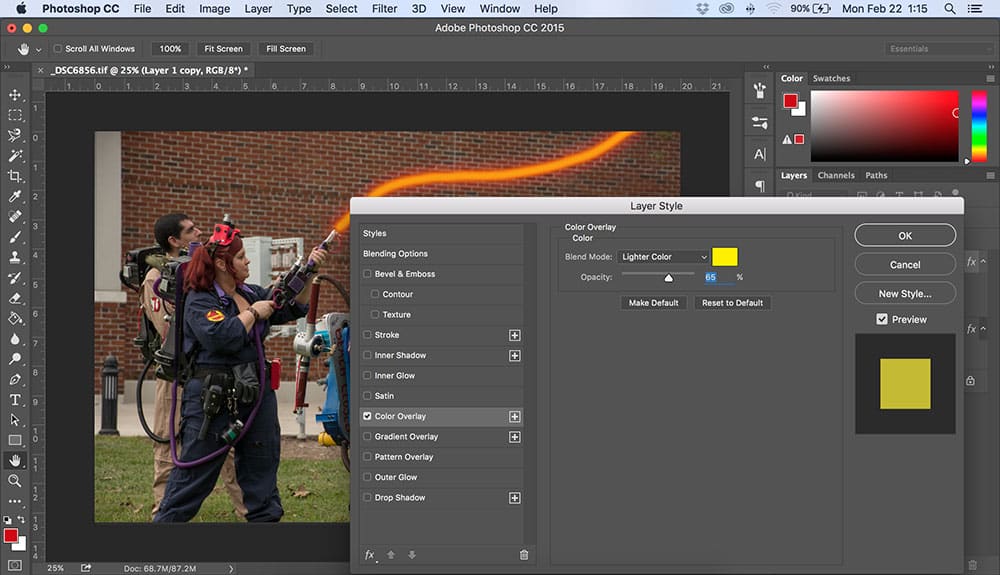
Step 5
Create a new layer (this should a blank, empty layer) and using the same size brush you used for the beam, paint small white dots.
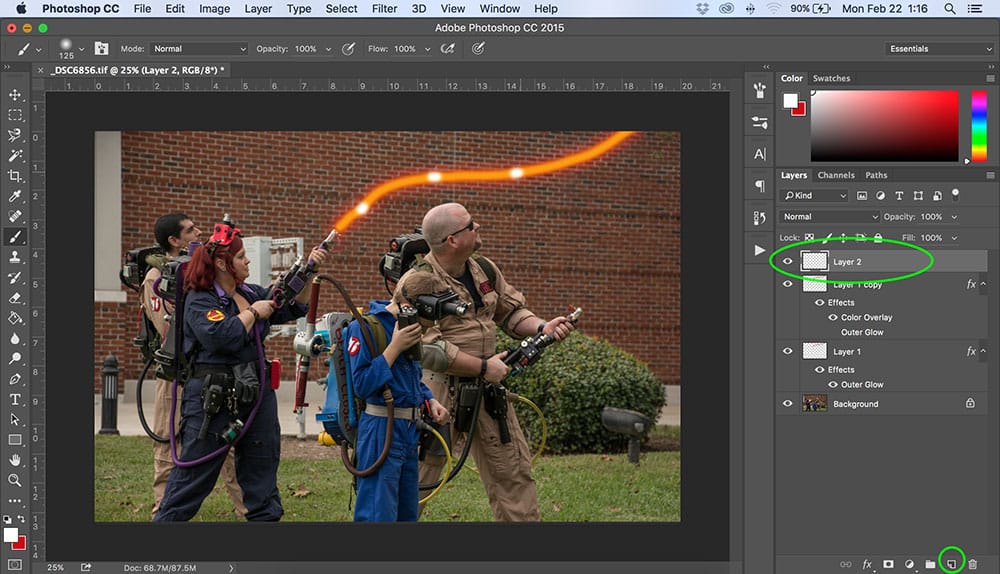
Now change the opacity of the layer you just painted, using something around 65%
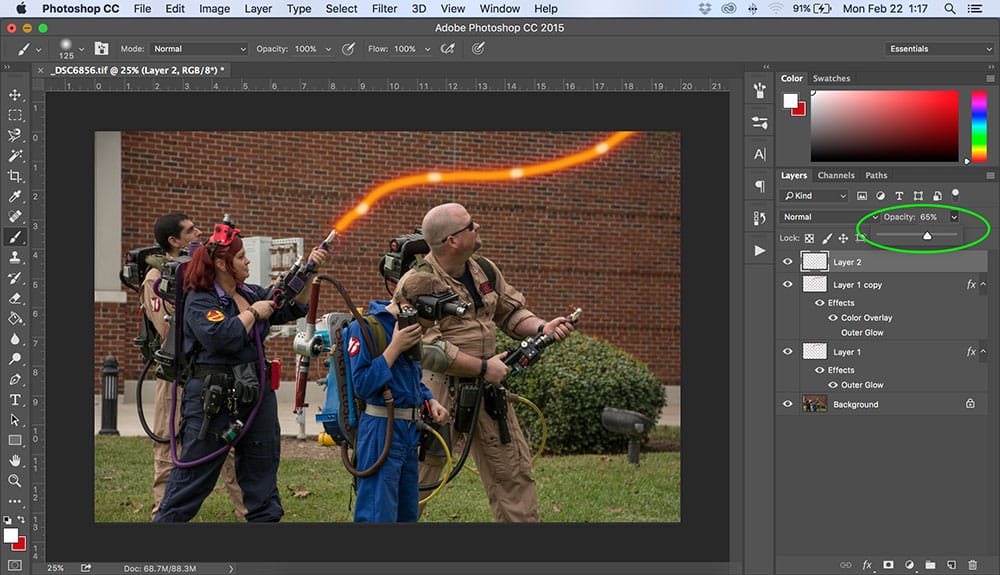
Step 6
Create a new layer (this should a blank, empty layer) and open up the brush options box. Reduce the size of the brush to something significantly smaller. For this image I used a 10px brush, but you can use whatever works best for you.
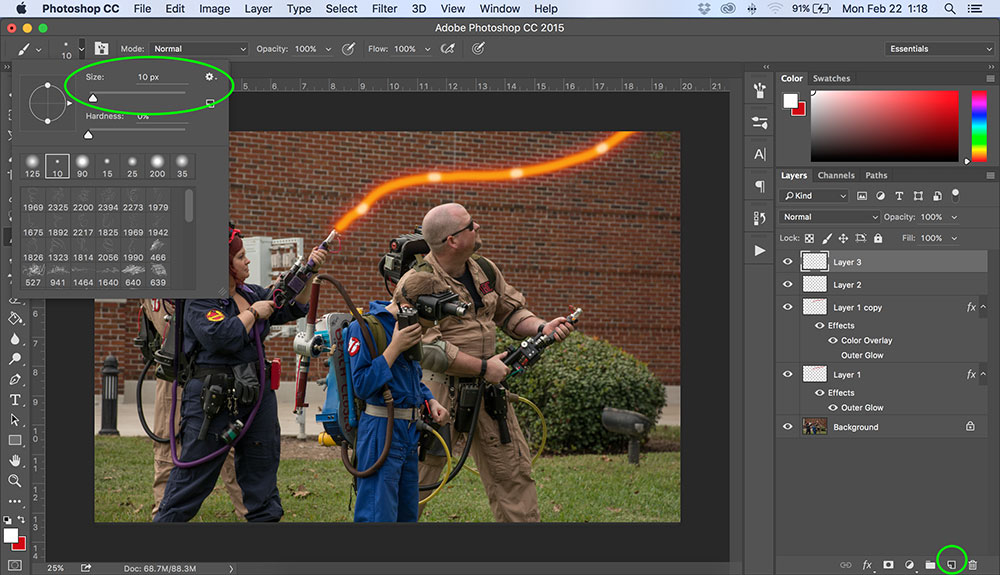
Now select a bright, light blueish color. I used d3effb.
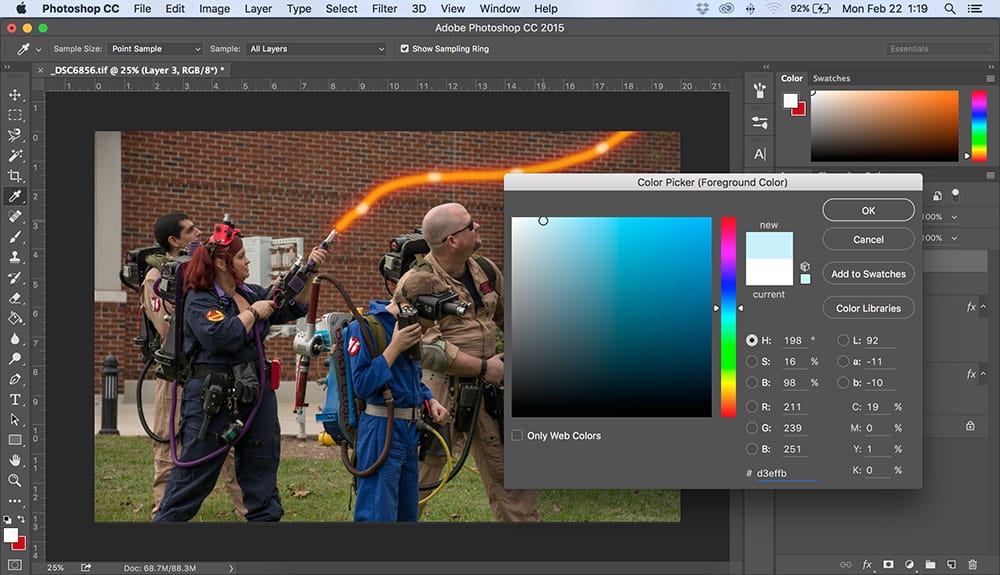
Paint a small jagged line over the beam
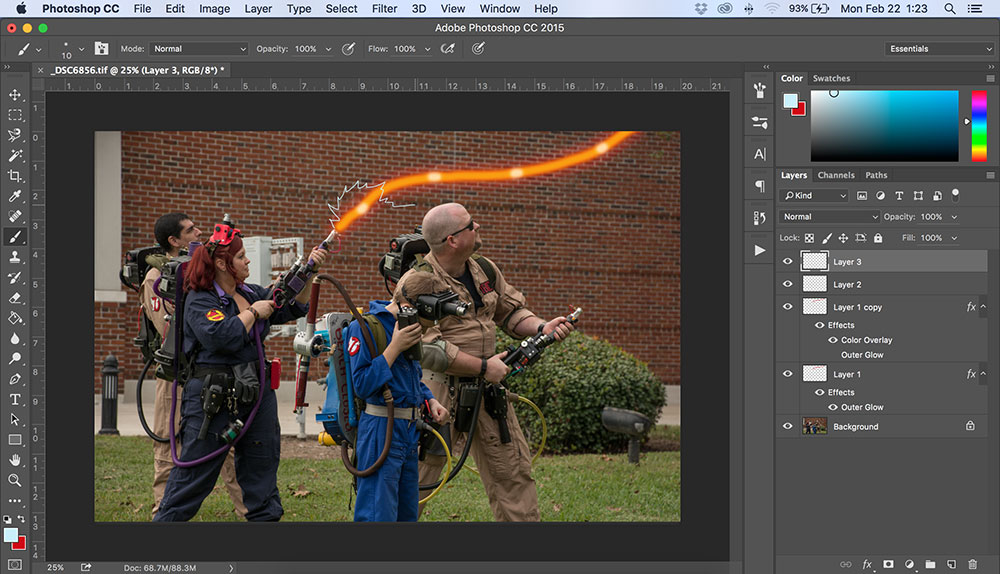
Now open up the eraser tool
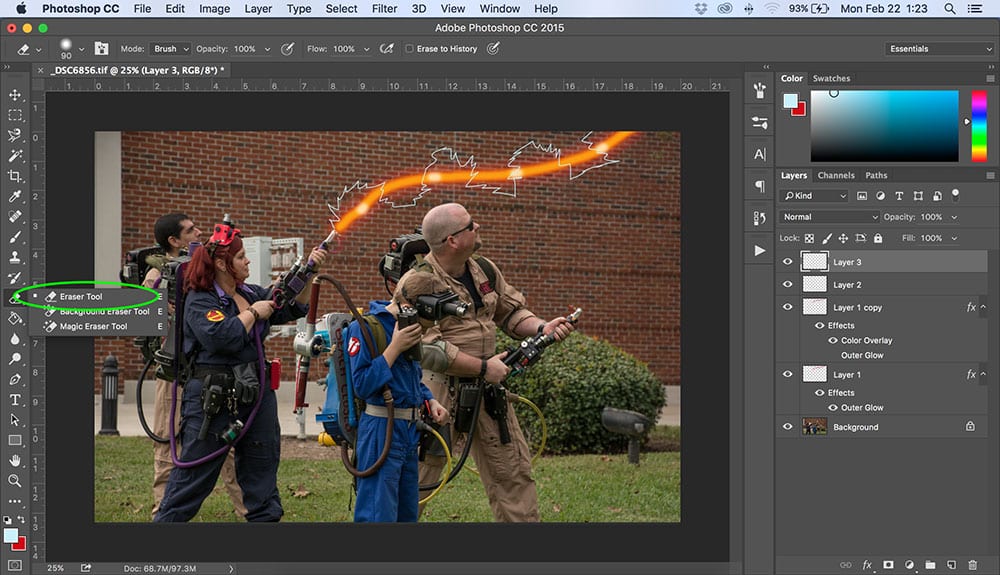
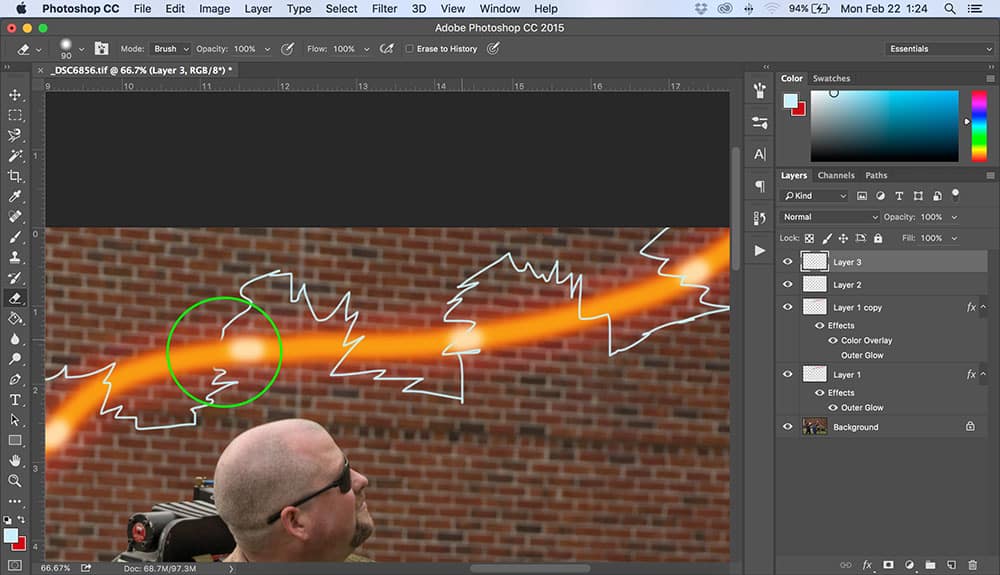
Erase parts of the line you just drew to give the appearance of the smaller beam going around the larger one.
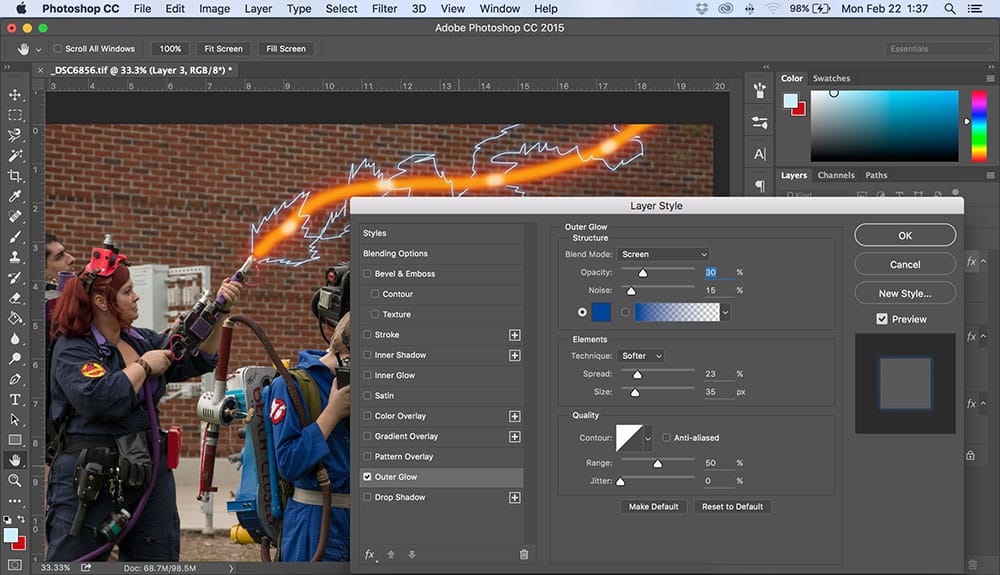
Now open up the Layer Styles options, and add an Outer Glow. This should be the same blue color or a bit darker.
You did it! Yay! Now, if you want to put another beam in the photo, it’s super easy. Just repeat steps 1 and 2.
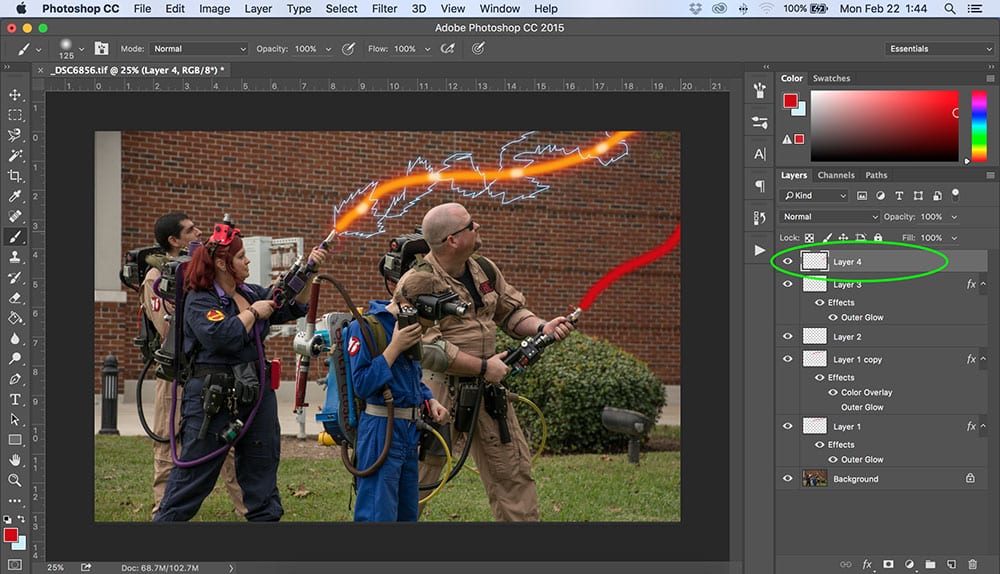
Now go back to the first layer you created, and in the top drop down menu select Copy Layer Style.
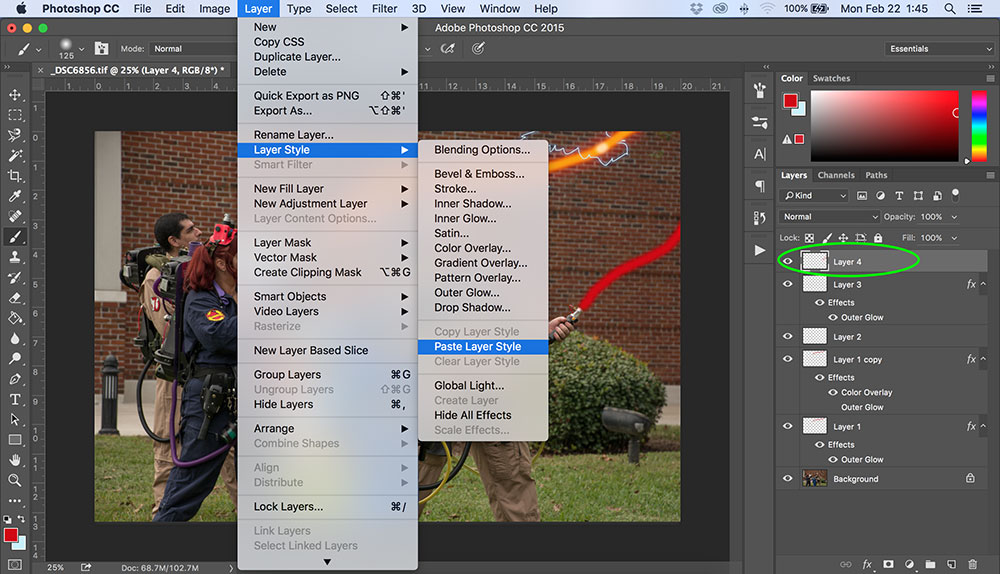
Then go back to the layer you just painted and Paste Layer Style to it. Now just repeat the process! When you are done, select Flatten Image.
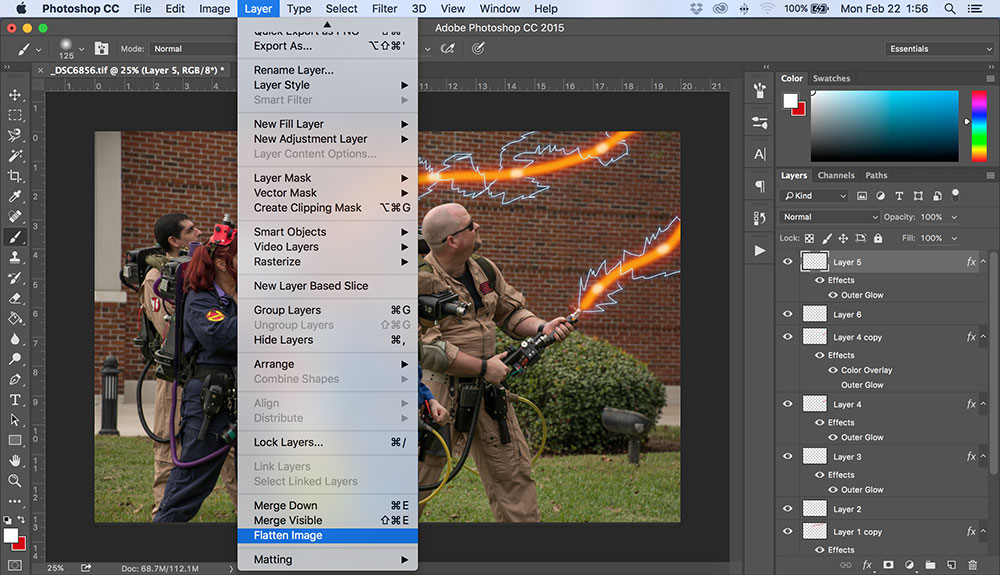
That’s all there is to it! You can leave the image as is, or add some other fun stuff, like lens flares and reflections, or whatever else you like.
It’s also important to note that my way is only one of a million different ways you can create this effect. Here is another great one posted by Fireblade Comics!
So have fun with it, be creative! And if you do happen to have any questions, or would like to share what you create, don’t be afraid to give me a shout out on social media.
