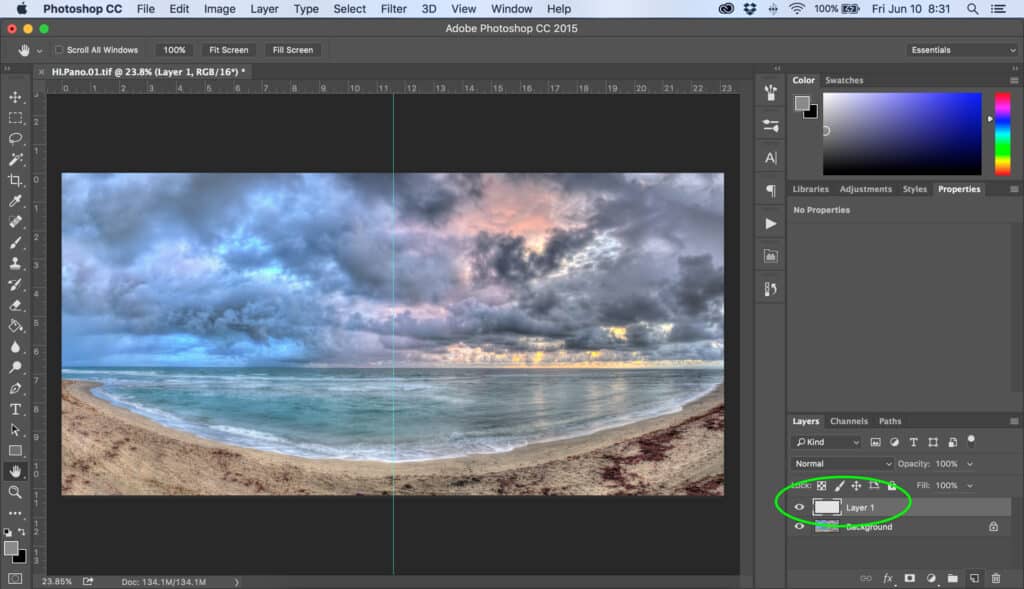
Open your file in Photoshop (or whatever software you like) and add a new blank layer. I also put a guide line right down the center, you don’t have to do this, but it will help.
How To : Create a Polyptych from a Single Image
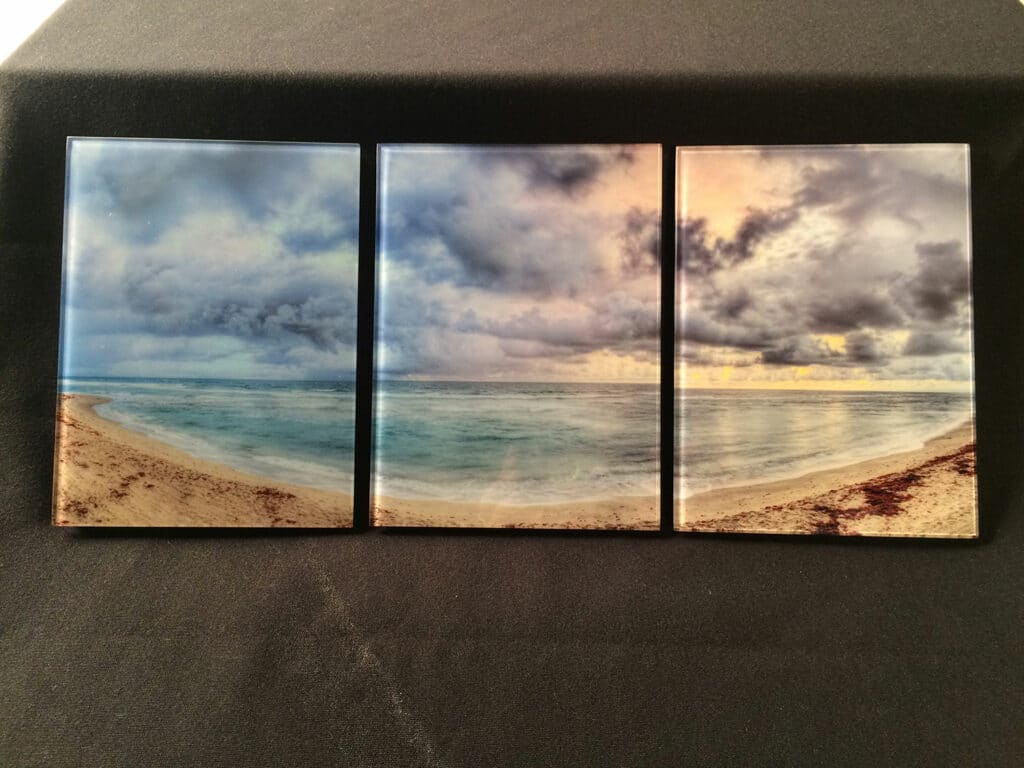
A poly-what? (kinda sounds like one of those tiny things that live in the ocean)
But a polyptych is a general word used to describe a work of art composed of multiple sections and/or panels. A diptych has 2 panels, a triptych has 3 panels, and so on.
There can be several reasons you might want to create a multi-panel piece. Maybe you have an awesome image that just won’t fit onto a standard size print? Maybe you just want something that looks a little different? Maybe you want to hang it in a corner? Regardless of your purpose, it can be a confusing process, but it doesn’t have to be. Here I will explain a fairly easy way to measure, crop, and save a single image for the purpose of printing it in multiple pieces.
You will need, a digital photograph file, and Photoshop (or other photo-editing software that supports layers). For reference, here I am using Photoshop CC 2015.
The first thing you have to do is choose the right image, because some will work better that others for this. I mean, I love my GrandMary, but I’m not going to cut her in half for a two panel portrait. For this example I’ll be using a panoramic beach image. Next, you will need to decide what size you want to have printed is, and what the ratio is for that size. (An 8″x10″ size print = 4:5 ratio & a 4″x6″ print is a 2:3 ratio) Here I am going to make 3 tiles, each with a 3:4 ratio.
Step 1
Step 2
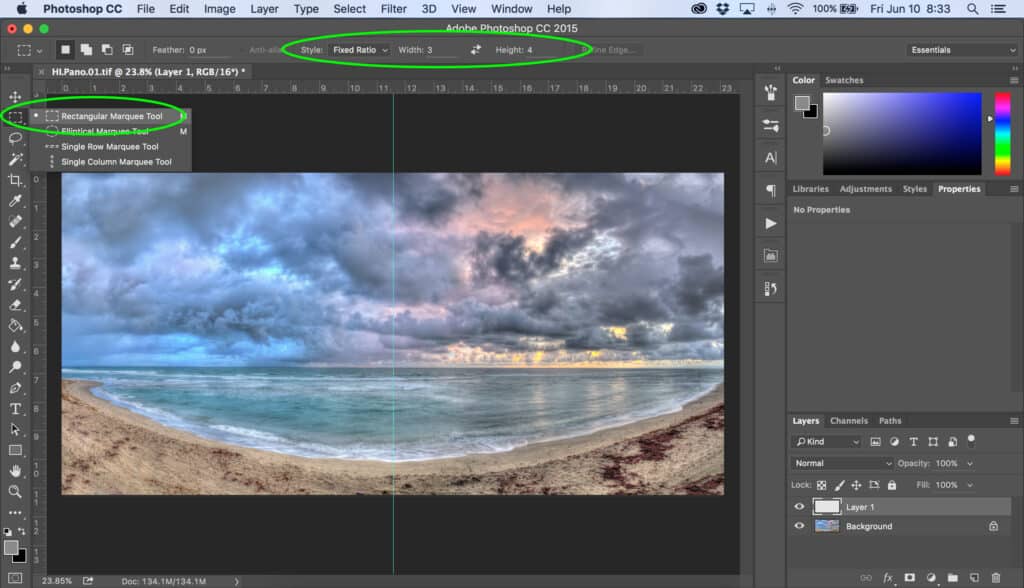
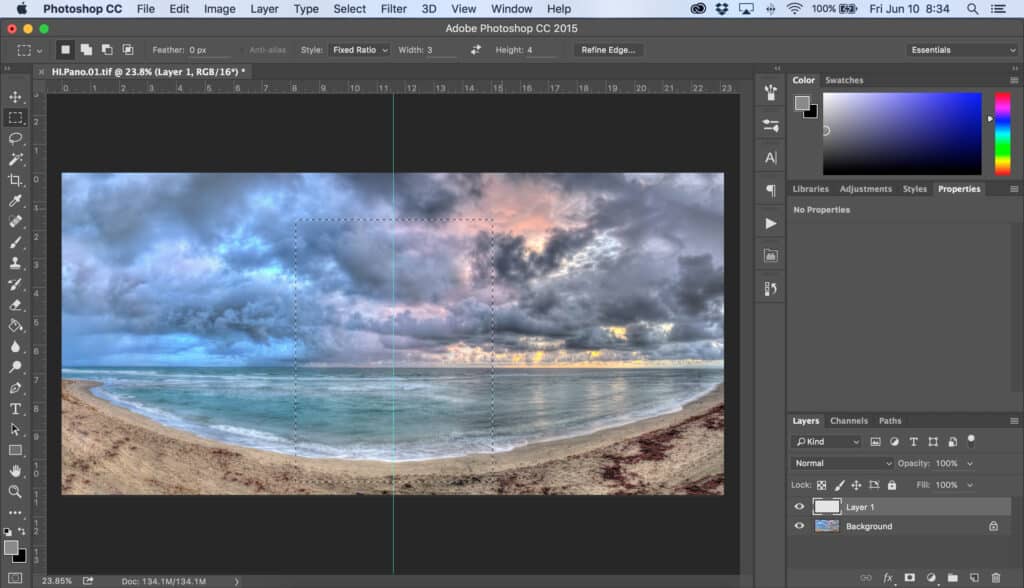
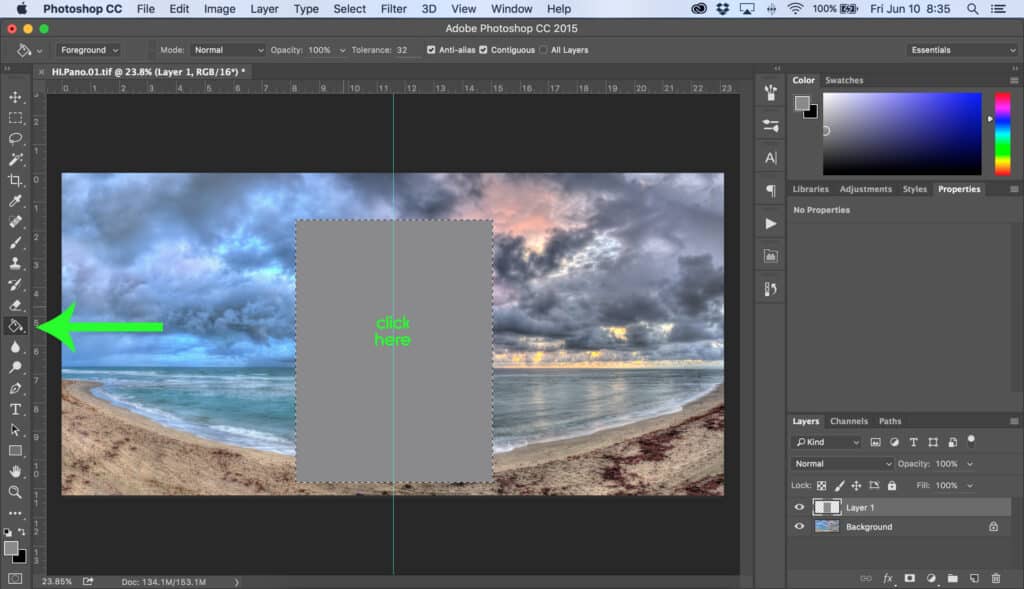
Click on the Rectangular Marquee tool (unless you are printing out some other ridiculous shape, and if so I want to see it!). Now look at the top of the Photoshop window and you will see a bunch of options. In the boxes titled Ratio enter your desired dimensions. Then draw out your shape and fill it with a solid color. (it can be any color you like, from neon orange to deep purple, here I used mid-grey because that’s what happened to be in my color box at the time)
Step 3
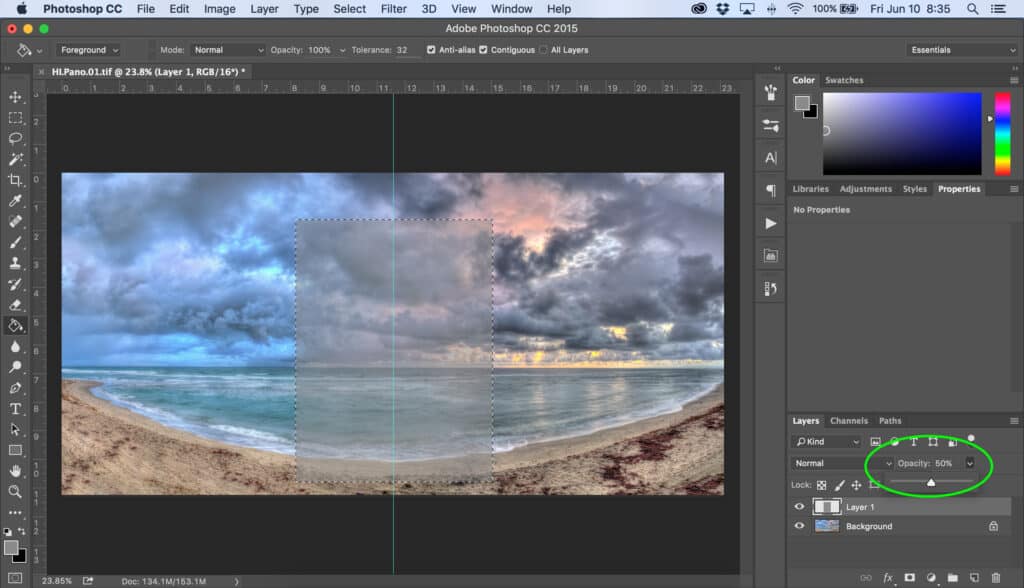
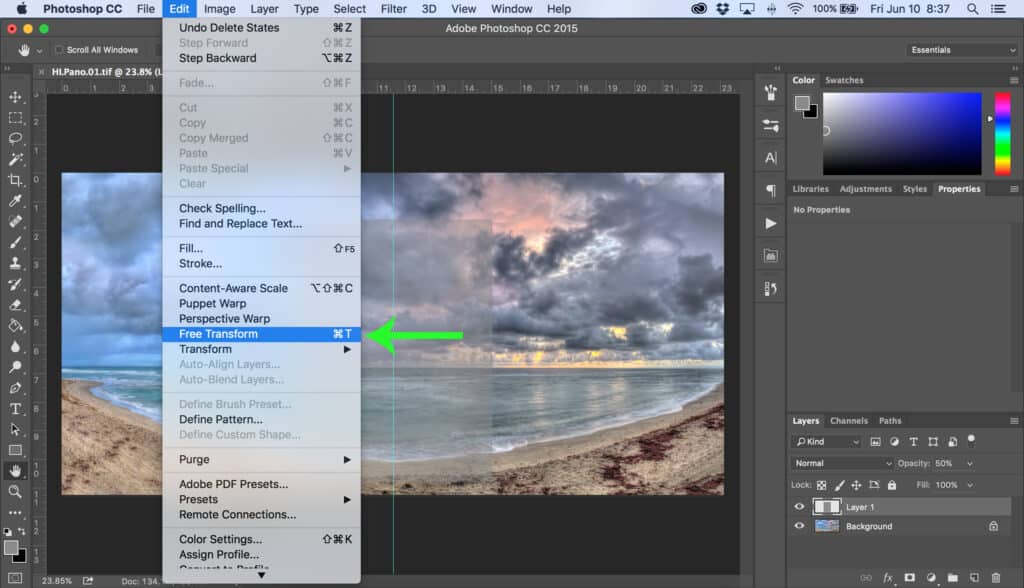
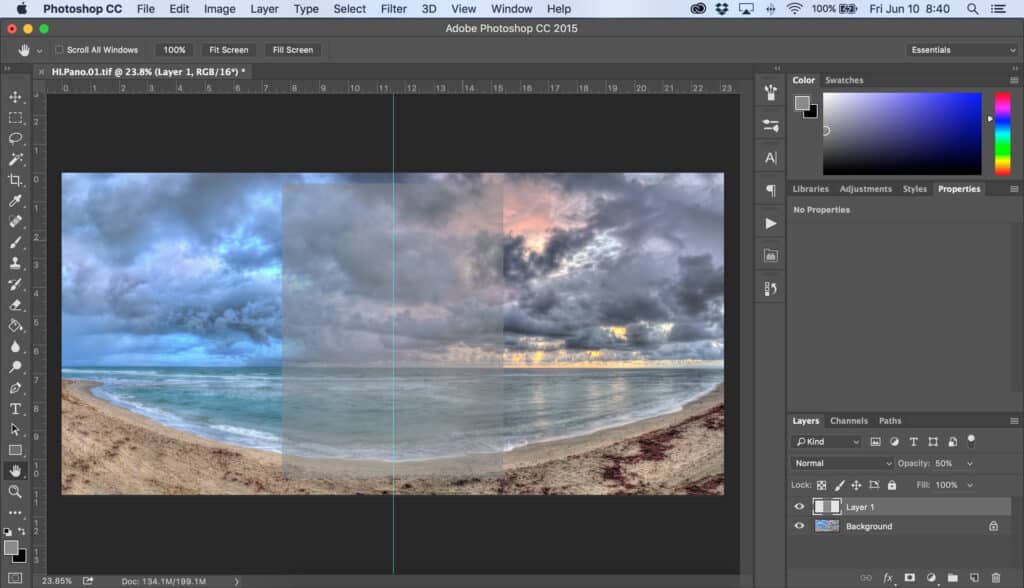
Change the Layer Opacity to 50%. Then select Free Transform (Control + T), to move this layer to the center and scale to your desired area of coverage. Be careful not to modify the ratio! This can be done very easily by holding down the Shift key while you move and resize the layer.
Step 4
Press Control + J to make a copy of the layer, then move the copied layer over to the left. Repeat this process as needed for adequate coverage of your entire image. You may need to do some adjusting (zooming in may help) to get it just right.
If you don’t like the way they look right now, delete the copied layers and repeat the process fresh from Step 3.
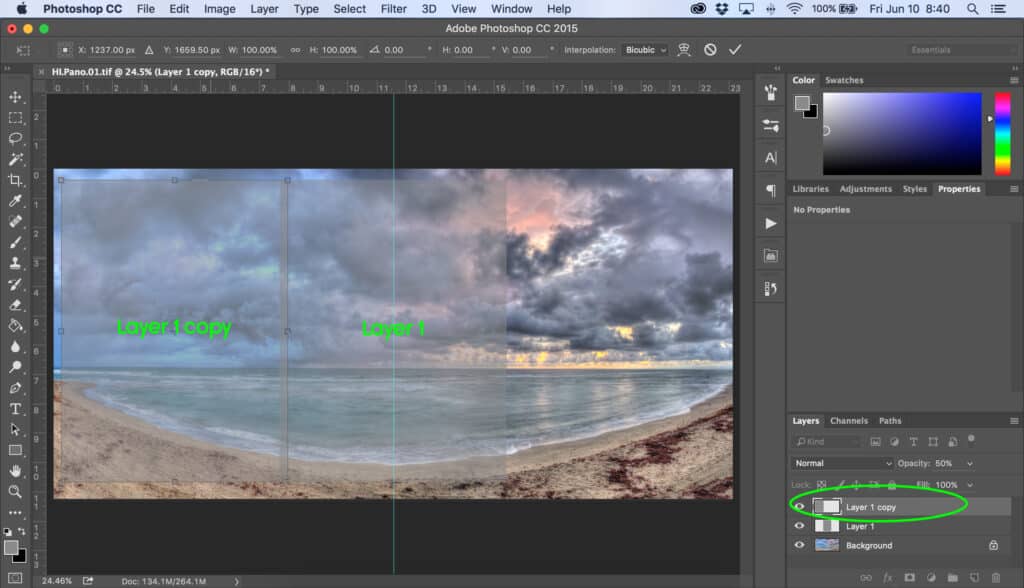
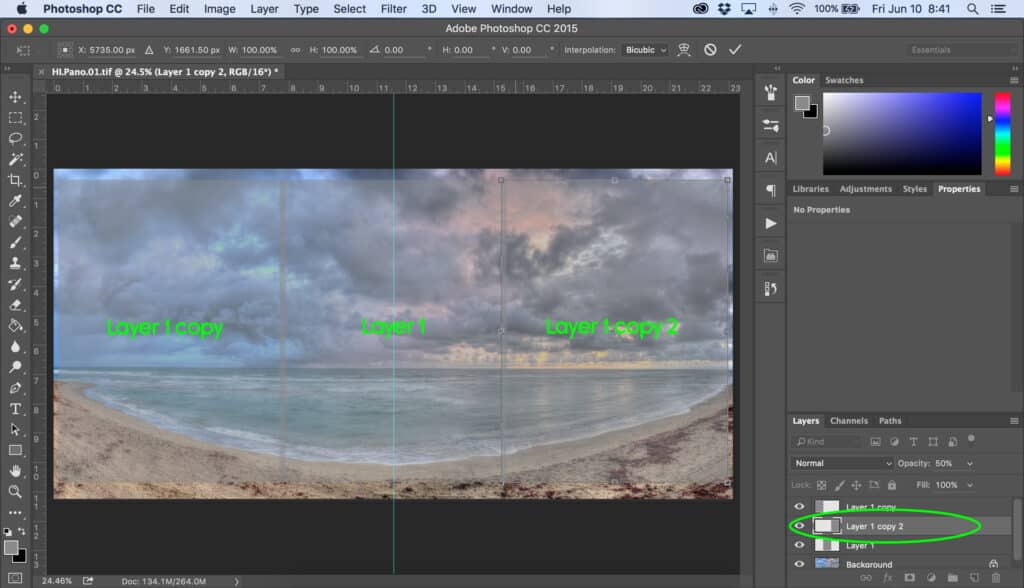
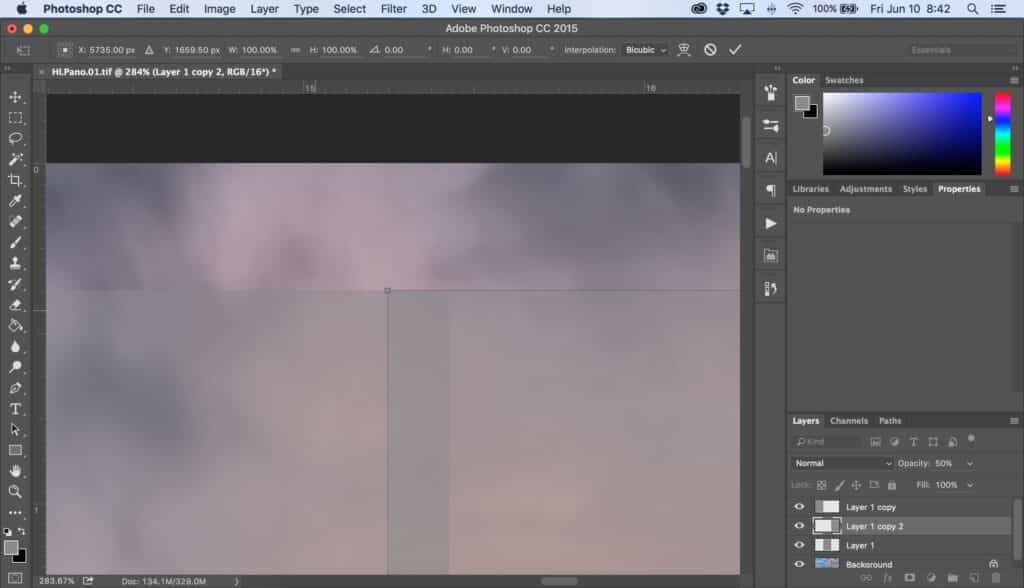
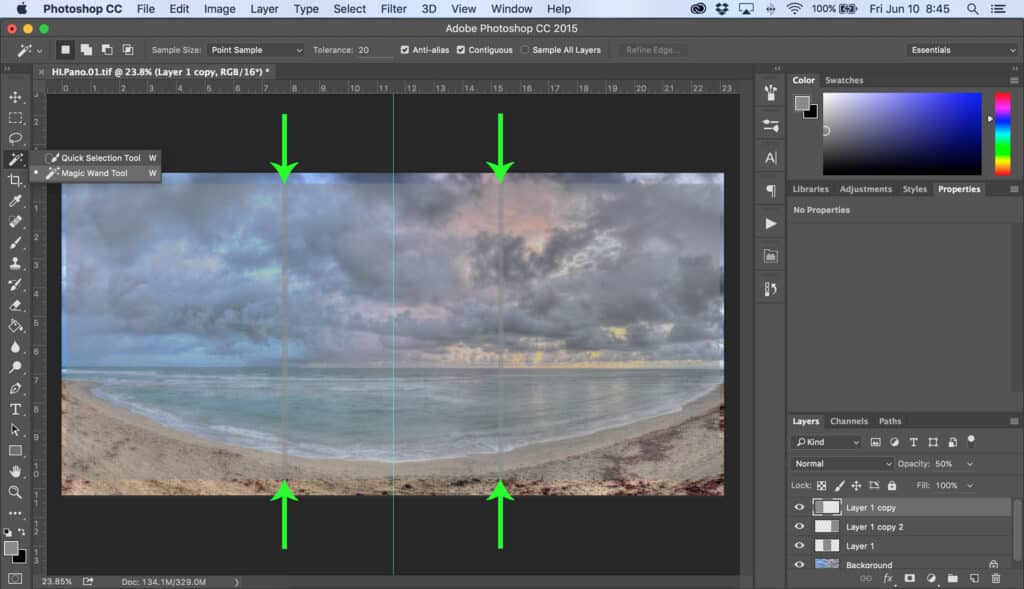
You can see that I overlapped the layers just a bit, this is to compensate for edges that can get trimmed off during the printing process. You do not have to do this, however if you do, keep it minimal! Also, check with the company you are getting prints from, usually they have an FAQ section on their website that will tell you how much can get cut off. Most of the time it’s around 1/8″ – 1/4″
Step 5
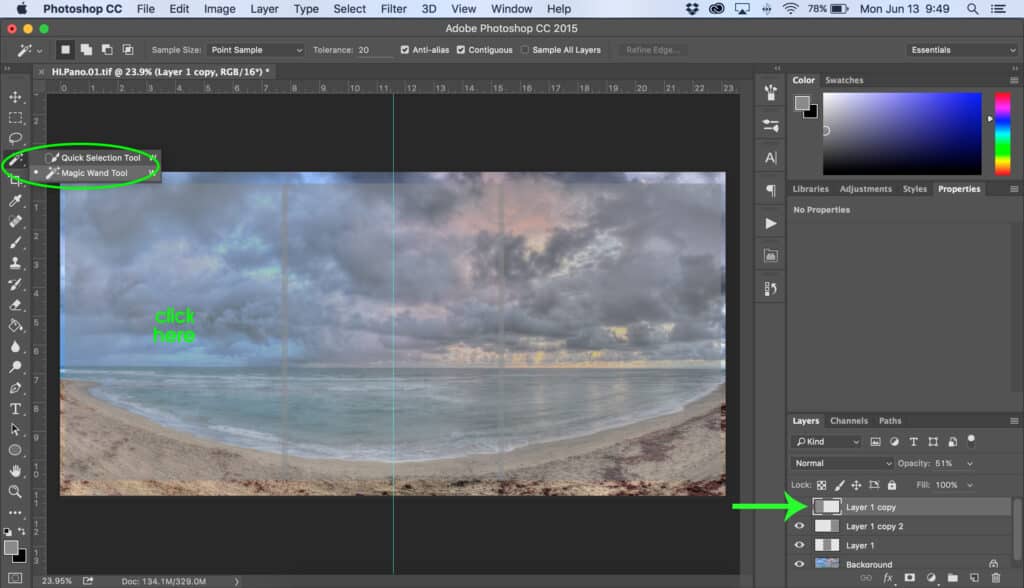
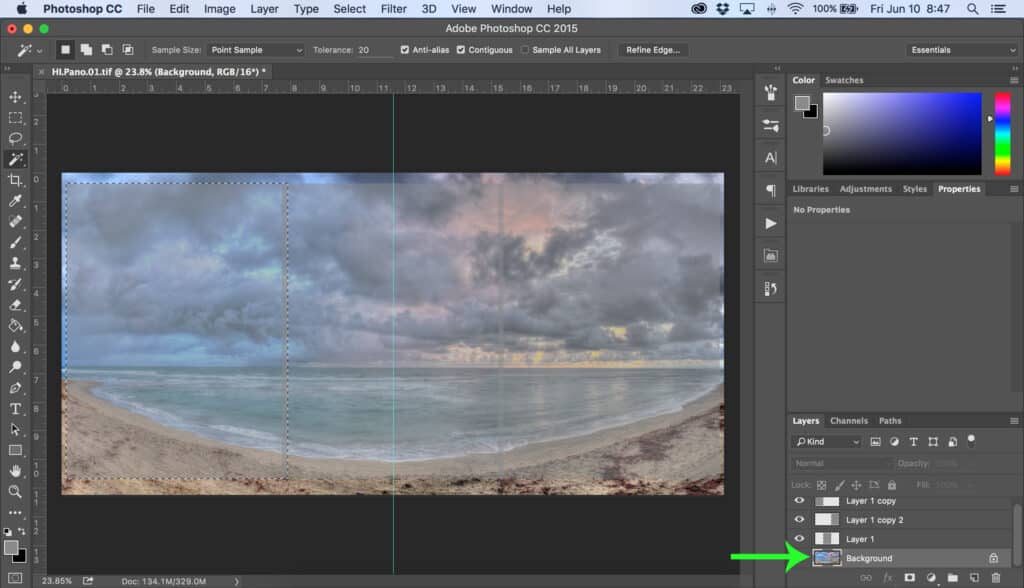
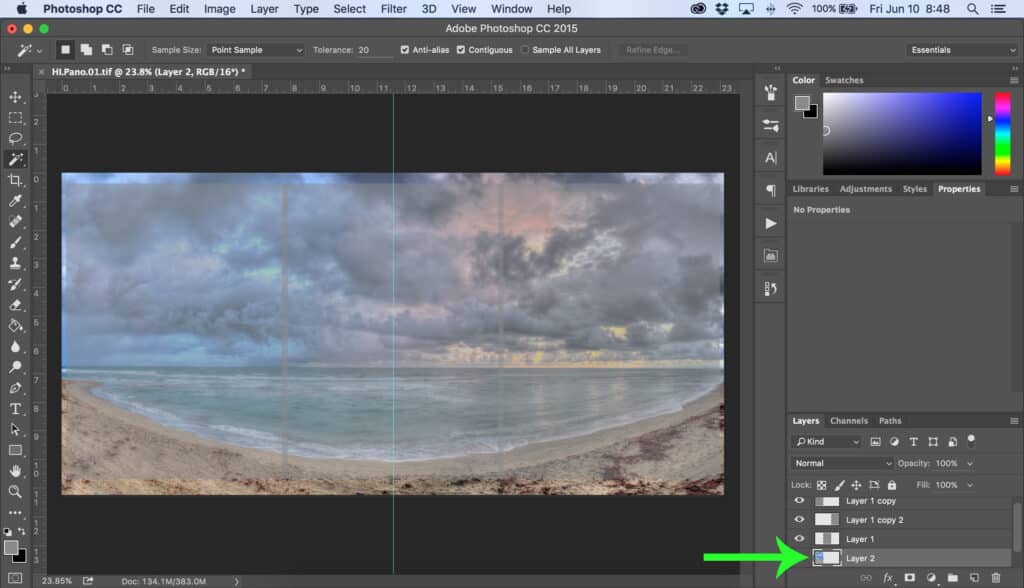
Ok, now for the easy part! In the layers palette, select one of your shape layers. I find it’s easier to work left to right, so I’ll start there. Using the Magic Wand tool, click anywhere on the color of that shape. (this will outline all the pixels with content in that layer) Now go back to the layers palette and click on your background layer. (your line of marching ants should still be visible) Press Control + C for copy, then Control + V for paste.
Step 6
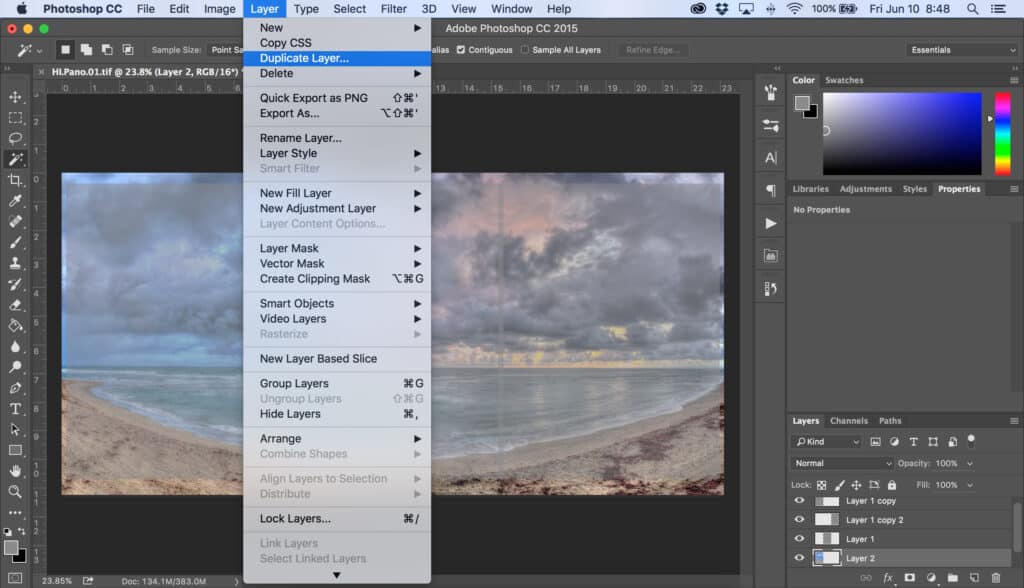
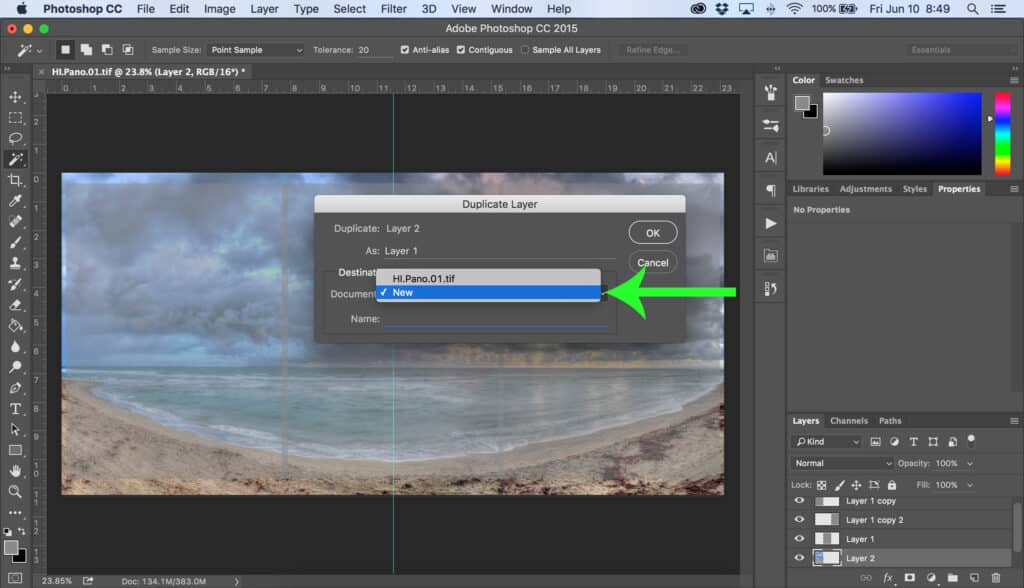
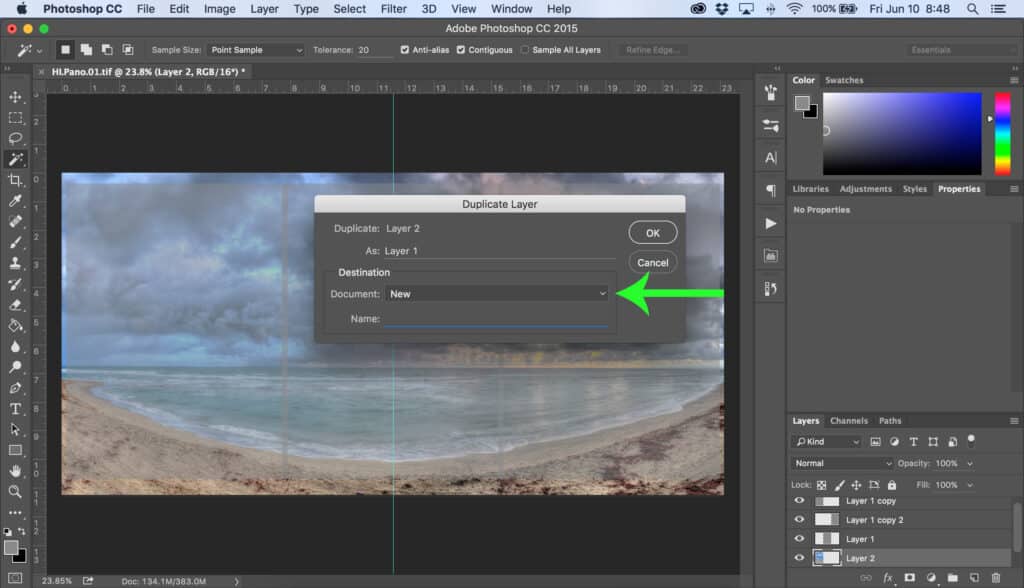
You will now see a new layer that is mostly blank but has a portion of your background image. Select that layer in the top drop down menu choose Layer > Duplicate Layer. A box will appear giving you different options. In the Document section, select New. Click Ok.
Step 7
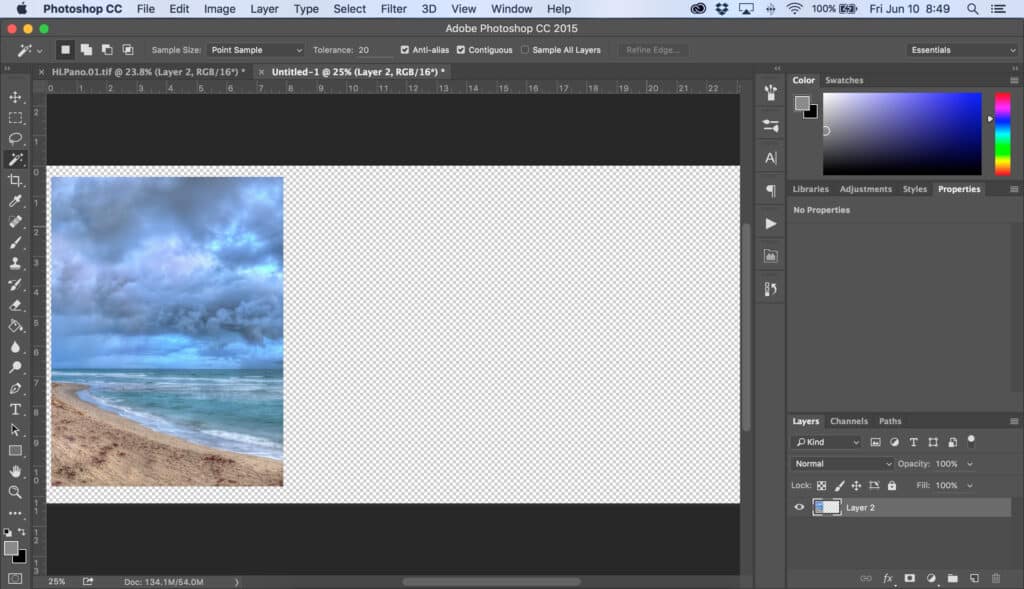
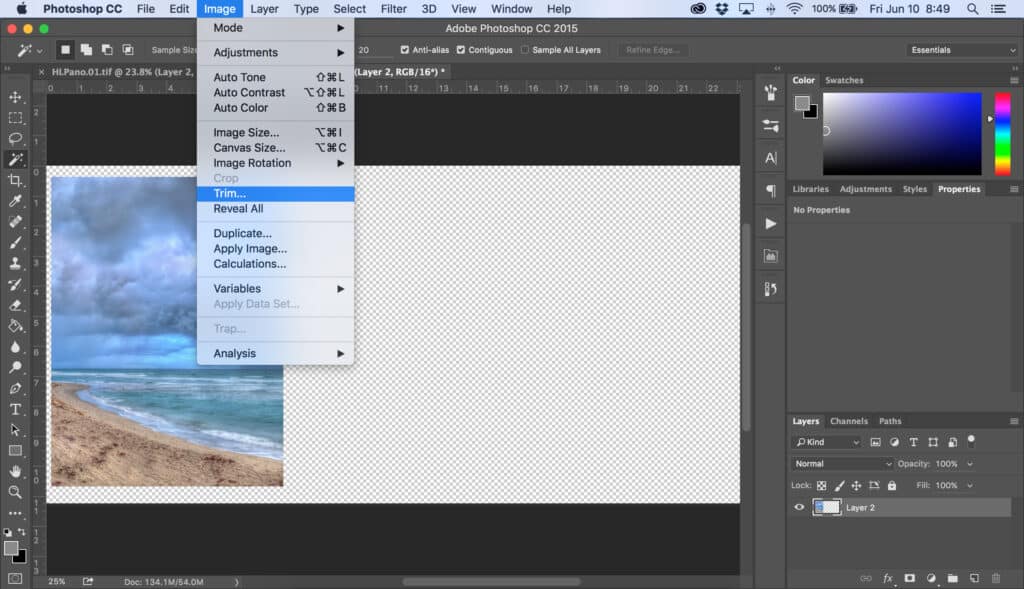
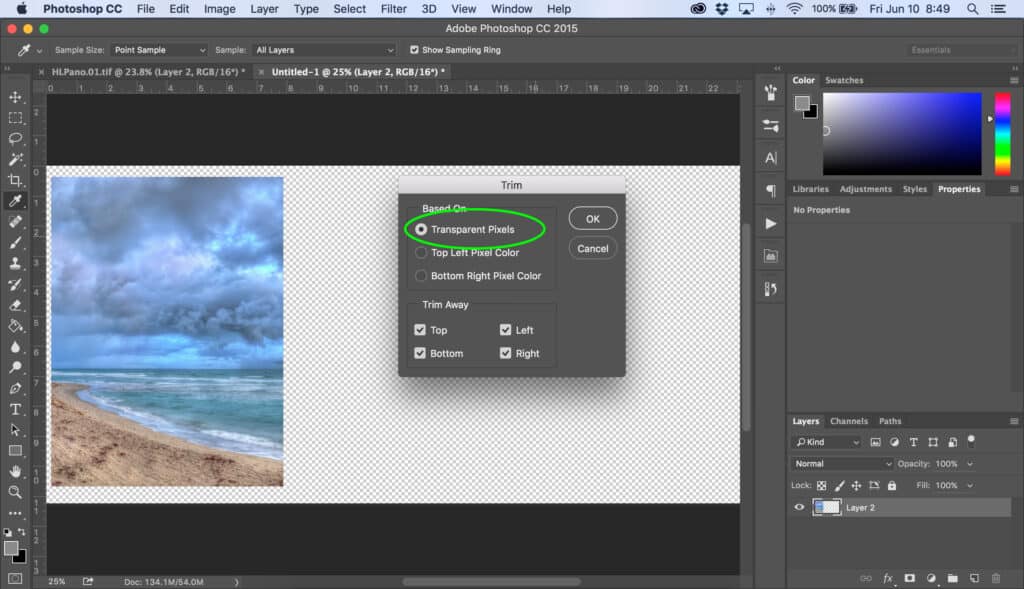
Hey! Look what you just made! I know, I know, you want to know what to do about all that extra blank space? Simple! Again with the drop down menu, select Image > Trim. When the box of options pops up select Based on Transparent Pixels and click OK.
You see?!
Step 8
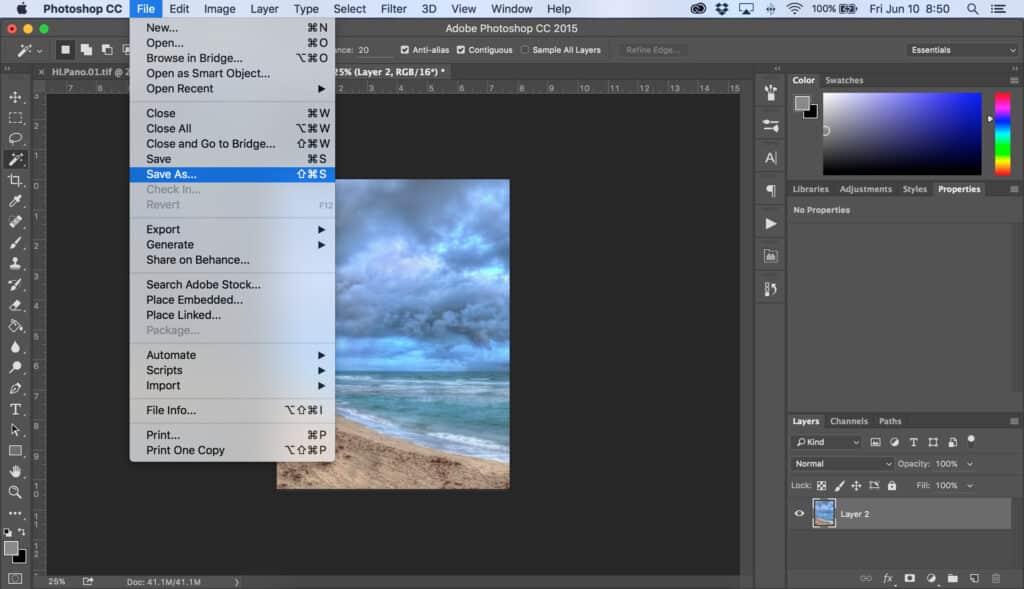
Now all you have to do is save it as a new .jpeg file and you’re done!
Repeat Steps 5-8 for the rest of the layers, and you will be ready to print!
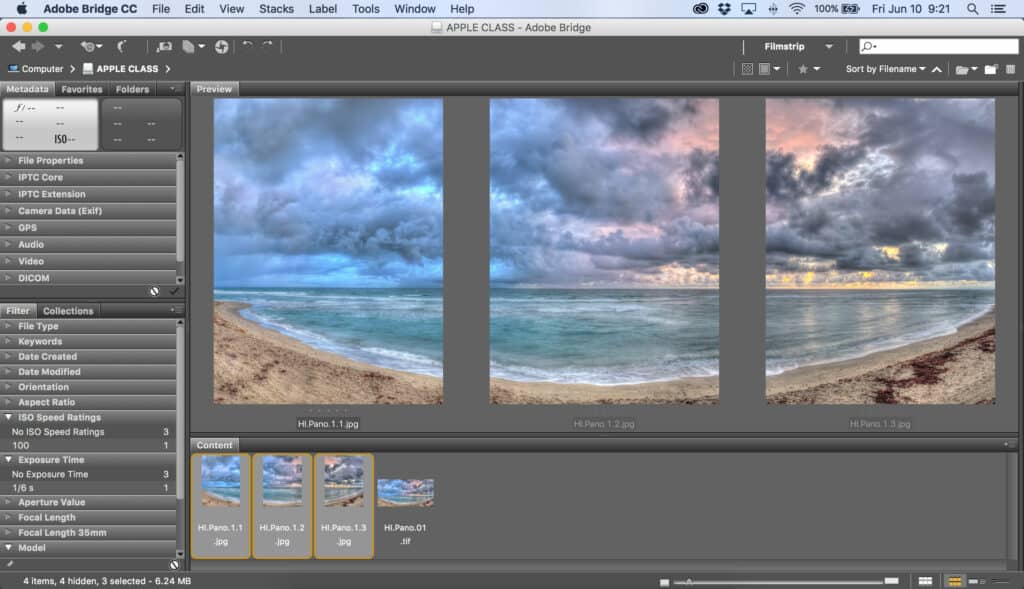
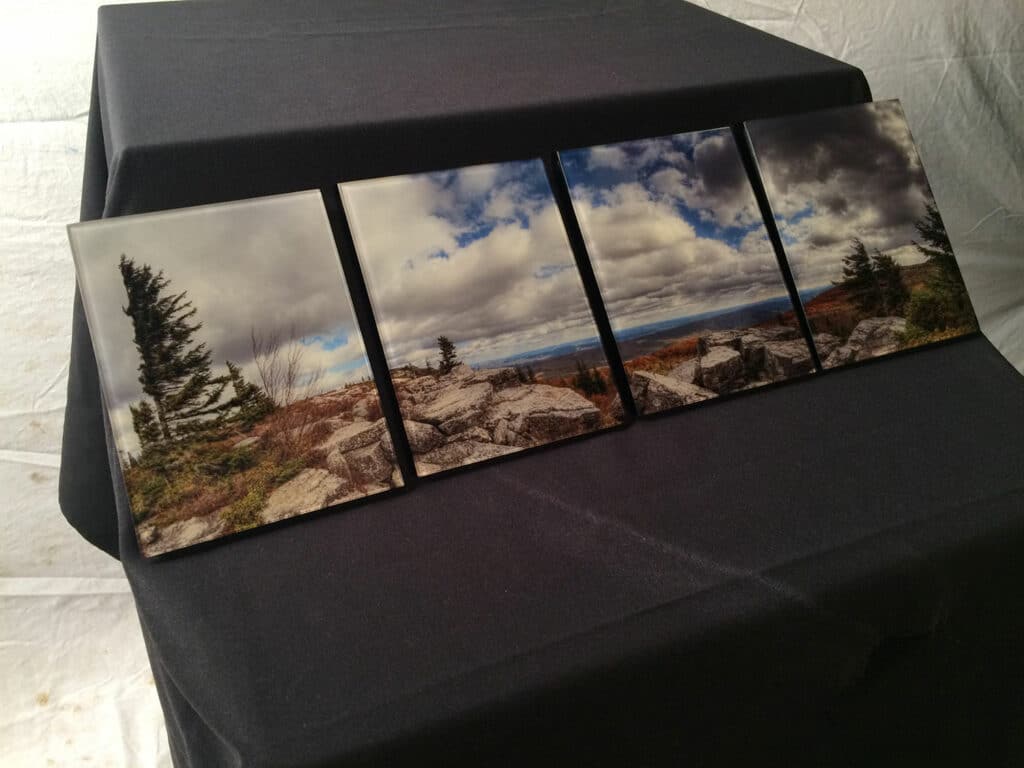
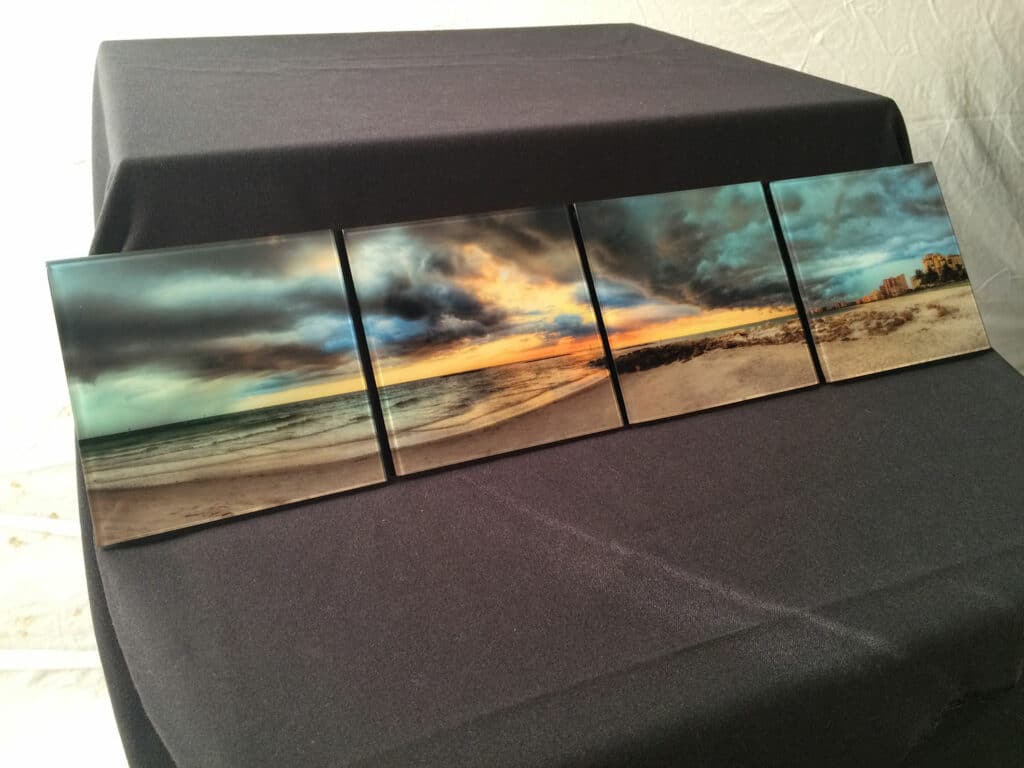
Now get out there and start creating! Below are some examples of my own, and if you have questions, or feel like sharing your creations, give me a shout. My social media links are all down at the bottom.
